Mastering the art of knife maintenance is essential for any home cook. A sharp knife not only makes food preparation quicker but also safer. With a well-honed edge, you can slice through herbs and vegetables effortlessly, enhancing your cooking experience.
On the other hand, a dull knife can be dangerous. It increases the risk of slips and accidental cuts, making your time in the kitchen less enjoyable. Keeping your blades in top condition helps prevent these mishaps.
Moreover, regular maintenance extends the life of your tools. A knife can be resharpened multiple times until its material is worn out. This guide will walk you through selecting the right tools, the sharpening process, and proper care techniques.
Why a sharp knife matters: honing vs. sharpening
Understanding the difference between honing and sharpening is vital for maintaining a sharp knife. Both processes serve distinct purposes in keeping your blades effective and safe.
Honing is the technique of realigning the burrs on an existing edge. It does not remove metal but instead straightens the blade, allowing it to perform optimally. On the other hand, sharpening involves removing material to create a new cutting surface. This process is essential when your knife becomes dull.
For frequent users, it’s advisable to hone your knives about once a week and sharpen them approximately once a month. A dull knife often requires more material removal, while light honing can restore alignment when the edge is merely rolled.
Manufacturers often specify bevel angles, typically around 15 or 20 degrees. A smaller angle generally feels sharper but may require more careful maintenance.
| Process | Purpose | Frequency |
|---|---|---|
| Honing | Realigns the edge | Weekly |
| Sharpening | Removes metal for a new edge | Monthly |
| Dull Knife | Requires material removal | As needed |
Choose the right knife-sharpening tool
Choosing appropriate sharpening tools can significantly enhance your knife’s performance. The right tools not only help maintain a sharp edge but also ensure your blades last longer.
Whetstones offer control and a refined edge
A double-sided whetstone is an excellent choice for maximum control. The Work Sharp Combination Whetstone features 1,000 grit on one side and 6,000 grit on the other. This allows you to achieve a finely honed edge with precision.
Honing rods help maintain an edge between sharpening sessions
Ceramic honing rods provide mild abrasion, making them ideal for routine maintenance. They help keep the edge aligned without removing too much material. In contrast, diamond rods can effectively shear away metal from both soft and hard blades.
When to use a manual or electric sharpener
Manual sharpeners are convenient for regular upkeep, especially those with spring-loaded guides that maintain a consistent angle. Electric sharpeners are best for severely damaged edges, as one tested model restored a knife after 76 strokes. Always follow the manufacturer’s instructions, especially for chef knives with asymmetrical edges.
A step-by-step guide: how to sharpen kitchen knives with a whetstone
A well-maintained blade is a game changer in food preparation. Using a whetstone is an effective way to achieve a sharp edge. Follow these steps to ensure your knives are always ready for action.
Prepare the stone and secure it on a stable surface
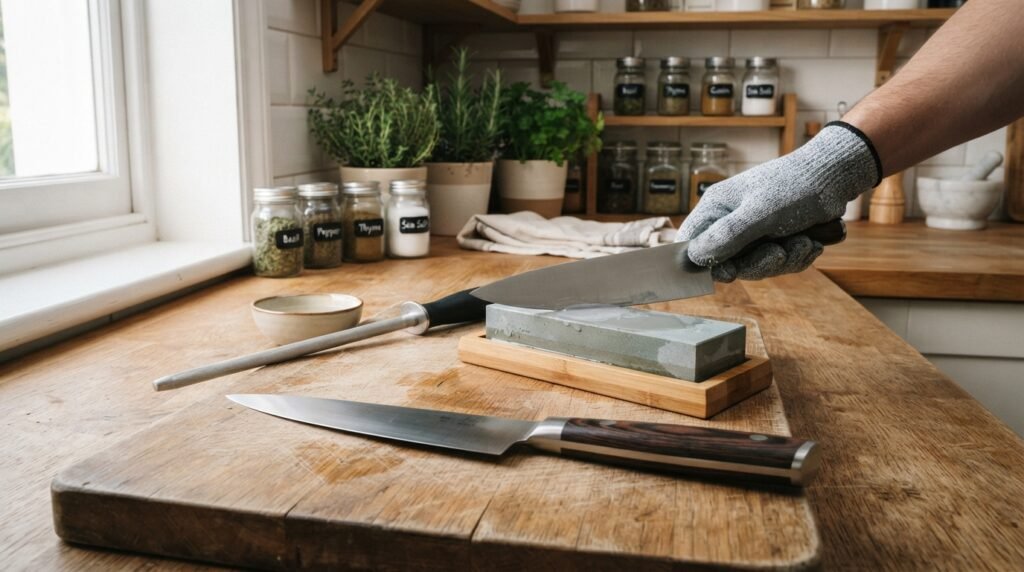
Start by soaking your water-based stone until bubbles stop, or follow the manufacturer’s instructions for oil-based stones. Secure the stone on a stable surface using rubberized shelf liner or damp paper towels to prevent slipping during sharpening.
Find the blade’s angle and sharpen the coarse side
Hold the blade at approximately 15 degrees for Asian-style knives or 20 degrees for Western-style knives. Begin on the coarse 1,000-grit side, applying pressure on the pulling stroke while working from the heel toward the tip in controlled sections.
Raise a burr, switch sides, and refine the edge
Continue sharpening until you can feel a burr along the entire edge. Flip the knife and repeat the same process on the opposite side. This ensures both sides are evenly sharpened.
Finish on the fine side and remove any remaining burr
Move to the 6,000-grit side with lighter pressure, using alternating passes to refine the edge and reduce the burr. Finally, finish with a leather strop or fine ceramic rod, ensuring your fingers are kept flat and away from the cutting edge throughout the process.
| Step | Action | Details |
|---|---|---|
| 1 | Prepare the stone | Soak until bubbles stop |
| 2 | Secure the stone | Use rubberized liner or damp towels |
| 3 | Find the angle | 15° for Asian, 20° for Western |
| 4 | Sharpen the coarse side | Use 1,000-grit for shaping |
| 5 | Refine the edge | Use 6,000-grit for finishing |
How to hone a knife with a rod
Regular honing is a crucial practice for anyone who values a sharp edge on their knives. This technique keeps your blade aligned and ready for use. By using a honing rod, you can maintain your knife’s performance with minimal effort.
Start by holding the honing steel vertically, with its tip firmly planted on the counter. Position the blade at a 15-degree angle away from the steel. Use light pressure as you sweep the blade down the steel, pulling it toward your body.
Complete four or five strokes on each side, resulting in eight to ten alternating passes. This method ensures that the entire edge makes contact with the steel, realigning the blade effectively.
For hard, high-carbon steels, ceramic honing rods are highly recommended. They provide just the right amount of abrasion without removing too much material.
| Step | Action | Details |
|---|---|---|
| 1 | Position the rod | Hold it vertically with the tip on the counter |
| 2 | Angle the blade | Maintain a 15-degree angle away from the steel |
| 3 | Apply pressure | Use light pressure while sweeping the blade |
| 4 | Complete strokes | Four or five strokes on each side |
| 5 | Choose the right rod | Opt for ceramic for hard, high-carbon knives |
Other ways to sharpen knives, including serrated blades
There are various techniques for maintaining the sharpness of your blades. Manual and electric sharpeners can be convenient alternatives, but it’s essential to follow each manufacturer’s instructions for angle and slot selection.
For serrated edges, using a manual serrated-edge tool is highly recommended. This tool can effectively follow the pointed, scalloped, and saw-toothed sections, ensuring a thorough sharpening process.
Interestingly, serrated knives usually require less frequent maintenance. Their pointed teeth experience less friction during cutting, allowing them to stay sharper longer.
In an emergency, you can use the unglazed bottom of a ceramic mug as a temporary solution for a small knife. Hold the mug at approximately a 15-degree angle and draw the blade carefully across the rough ceramic surface.
| Method | Details | Frequency |
|---|---|---|
| Manual Sharpeners | Follow instructions for angle and slot | As needed |
| Manual Serrated Tool | Effective for pointed and scalloped edges | As needed |
| Ceramic Mug | Temporary method for small knives | Emergency use |
Test your knife’s sharpness and avoid common mistakes
Testing the sharpness of your blade is crucial for safe and effective food preparation. A properly sharpened edge should glide through paper without catching or sliding across it. Newspaper works well for this test, allowing you to check if the entire length of the blade moves smoothly.
If you notice sliding, snagging, or tearing, treat it as a sign of a dead spot or uneven section that needs more refinement. Consistency is key—keep your sharpening angle steady to avoid creating a rounded or uneven edge.
Also, remember to keep your fingers flat and clear of the cutting edge. Never run a finger parallel to the blade while checking for burrs. Additionally, if you have a full-bolster knife, be aware that it may not pass completely through some sharpeners, which can lead to an uneven blade shape.
- Test the newly sharpened edge with newspaper, ensuring it glides smoothly.
- Treat any snagging as a sign that further refinement is needed.
- Maintain a consistent sharpening angle to prevent uneven edges.
- Keep fingers flat and away from the blade at all times.
- Check if a full bolster prevents complete contact with the abrasive.
Keep kitchen knives sharp with simple care habits
Caring for your blades can greatly enhance their longevity and performance. By adopting a few straightforward habits, you can keep your tools sharp and ready for use.
Start by hand-washing your knives with warm, soapy water after each use. Make sure to dry them completely instead of tossing them in the dishwasher. Leaving dirty knives in the sink can lead to scratches and damage from other dishes.
When it comes to cutting surfaces, opt for wood or plastic boards. These materials are friendlier to edges than stone or glass, which can dull them quickly.
Proper storage is also crucial. Instead of tossing your blades into a drawer, consider using a knife block, magnetic strip, or drawer organizer. Loose storage can cause nicks and injuries. Regularly clean and dry any sheaths or guards to prevent moisture damage.
For added protection, consider using food-safe blade wax for carbon steel. This can help guard against moisture and maintain the sharpness of your blades.
| Care Habit | Details | Frequency |
|---|---|---|
| Hand-wash | Use warm, soapy water | After each use |
| Dry | Completely dry knives | Immediately after washing |
| Cutting Board | Use wood or plastic | Always |
| Storage | Knife block or magnetic strip | Always |
| Blade Wax | Apply for carbon steel | As needed |
Conclusion
A dependable edge comes from steady habits, not one big repair. Regular honing, periodic sharpening, and safe storage help your blades stay ready for daily cooking. These simple steps also reduce wear and support safer cuts.
Choose a whetstone for control, a rod for upkeep, or a manual or electric sharpener for quick repairs. Keep a steady angle, use light pressure on finishing passes, and test the edge with paper. A smooth cut is a useful sign of a clean edge.
Between sessions, hand-wash each blade, dry it right away, and use wood or plastic boards. When home care falls short, Montana Knife Company’s Generations promise offers free resharpening and restoration for covered blades. With a few good habits, your tools can stay reliable for everyday meals.