Surprising fact: a single dripping tap can waste over 3,000 gallons of water each year, enough for months of household use.
Your sink drip is more than an annoying sound. It signals worn parts and lost water that can raise bills and harm fixtures.
You can learn simple repair moves and regain control of your plumbing. With the right tools and a little time, many faucets and handles are easy to service.
This short guide shows one clear step you can follow. It helps you spot common issues, replace small components, and keep your home safe from leaks.
Key Takeaways
- One drip equals big water loss and higher bills.
- Most faucets have replaceable parts and simple fixes.
- Working on your sink builds useful home repair skills.
- Early repair prevents bigger plumbing damage later.
- A clear plan saves time and reduces stress.
Understanding Why Your Faucet Is Leaking
A single drip can reveal which small part inside your sink needs attention. Start by noticing the sound and timing of each drop. That helps you narrow down whether the valve, seal, or another part is failing.
According to Alvarez Plumbing, serving Monterey County since 1988, a faucet that leaks twice a minute can waste about 100 gallons per year. That lost water means higher bills and potential moisture damage inside cabinets or walls.
Different types of faucets show different symptoms. Compression units often drip when washers wear. Cartridge and ceramic models usually fail at seals or valves. Inspecting your type faucet helps you spot likely culprits quickly.
Identifying the exact part that causes the leak matters. Ignoring small leaks can lead to bigger plumbing damage and costly repairs down the road. Early action protects your home and keeps repair needs small.
- Tip: Take a photo of the faucet before disassembly so you can match parts later.
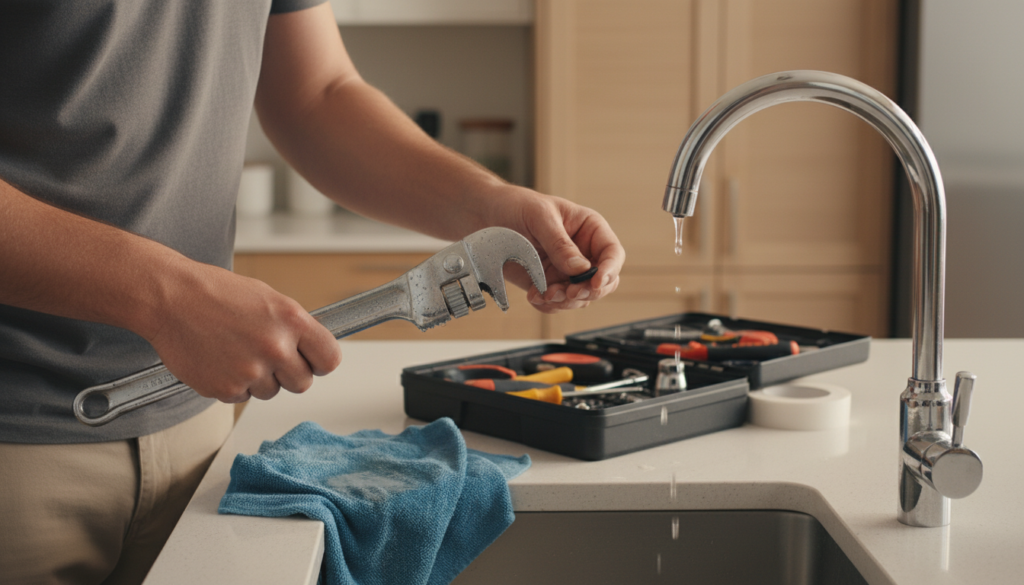
Essential Preparation Before You Start
Before you lift a wrench, spend a few minutes getting your workspace ready—small prep stops big messes.
Protecting your workspace
Protecting Your Workspace
Clear the countertop and set a towel in the sink. This protects the finish and catches any small screw or part that falls.
Keep the faucet handle and loose parts on a clean tray or cloth so they stay organized. A tidy area helps you work faster and reduces frustration.
Shutting Off the Water Supply
Locate the valves under your kitchen bathroom sink and turn water off fully before removing parts. Kuhn Plumbing, serving Chicago since 1908, warns that failing to shut water can cause a messy disaster.
If you cannot find local shutoff valves, shut water at the main home line. Taking this one step prevents accidental flooding while you work.
- Place a towel in the basin to stop scratches and catch small parts.
- Leave a clear area for the handle, tools, and replaced pieces.
- Clean the aerator while the water supply is off to boost flow after reassembly.
| Action | Why it matters | Quick tip |
|---|---|---|
| Turn water off at valves | Stops sudden flow and prevents flooding | Turn both hot and cold valves fully clockwise |
| Protect sink surface | Prevents scratches and lost screws | Use a towel and a shallow dish for parts |
| Clean aerator | Improves water flow after reassembly | Soak screen in vinegar if it’s mineral-clogged |
“Shut water before you touch the faucet; it keeps repairs simple and dry.”
How to Fix a Leaking Faucet Without Calling a Plumber Step by Step
Start by removing the handle and trim so you can access the internal cartridge or valve seat. Work calmly and keep screws and small parts on a cloth.
Replacing cartridges and O-rings
- Shut water at the supply and remove the faucet handle. Use a screwdriver but avoid stripping screws.
- Pull the cartridge straight out and inspect the O-ring. Replace worn rings and the cartridge if damaged.
Handling washer replacements
For compression or ball models, remove the valve and swap the washer. Match the replacement to your model for a proper seal.
Managing ceramic disk repairs
If your ceramic disk leaks, clean the valve seat and replace worn seals. Reassemble gently and seat the valve correctly for hot cold balance.
| Type | Common failing part | Quick check |
|---|---|---|
| Cartridge | O-ring / cartridge | Pull cartridge, inspect O-ring for cracks |
| Compression (washer) | Washer | Remove valve, compare washer size before replacement |
| Ceramic disk | Seals / valve seat | Clean seat; replace seals if water flow still varies |
“Turn water supply back on slowly and watch for steady water flow before you finish.”
Final check: after reassembly, turn water on slowly and test handles. Clean the aerator if flow feels weak and recheck for any persistent leak.
Identifying Your Specific Faucet Type
Knowing the right faucet type saves time and money. A quick look at handle motion often names the class: cartridge, compression, or ball.
Watch how the handle moves. If the handle lifts and turns, you likely have a cartridge faucet. If two separate handles control hot cold water, it may be a compression model. A single rounded handle that moves in many directions often hides a ball mechanism.
Distinguishing Between Compression and Ball Faucets
- Compression: Two handles, up/down turns, worn washers cause drips.
- Ball: One control with varied motion; look for wear on the ball and seats.
- Cartridge: Straight pull or single-handle tilt; cartridges and O-rings wear differently.
Check for mineral buildup around the spout and under handles. Deposits can block flow and mimic mechanical failure.
“Identify the type faucet before you buy parts — it prevents wasted time and incompatible components.”
Common DIY Plumbing Pitfalls to Avoid
A single wrong tool or forced turn can wreck your faucet and spike repair bills.
Don’t rush. Botched DIY work can lead to major water damage. Industry data shows average costs near $11,098 when repairs go bad.
As the team at Alvarez Plumbing, serving Monterey County since 1988, warns: using the wrong tool to remove faucet parts often causes permanent damage.
Never force a stuck screw or faucet handle. Forcing can crack the valve seat or strip threads on your valve and spout.
Ignore O-rings and washers at your peril. Skipping these small parts usually brings the same leak back quickly.
| Common mistake | Risk | Quick fix |
|---|---|---|
| Forcing screws/handles | Cracked valve seat or stripped threads | Apply penetrating oil; wait then turn gently |
| Wrong replacement part | Persistent leaks, wasted time | Match your type faucet or bring old part to store |
| Skipping aerator/valve check | Blocked flow and recurring problems | Clean aerator; inspect valve before reassembly |
“If you are unsure, calling a pro can be cheaper than repairing real damage.”
Proactive Maintenance for Your Home Plumbing
A little maintenance now can stop a trickle from turning into costly damage. Small, regular checks keep your faucets working well and save you time and money.
Cleaning Aerators to Improve Flow
Start with the aerator in the kitchen bathroom sink. Unscrew the aerator, rinse the screen, and soak it in vinegar if mineral buildup blocks flow.
Check the valve seat and nearby parts while the aerator is out. Replace a worn washer or O-ring before a small leak becomes a larger repair.
Make it a habit each season to turn water supply valves slightly. This prevents them from seizing and keeps your home plumbing ready in an emergency.
| Maintenance action | Why it matters | Quick check |
|---|---|---|
| Clean aerator | Restores steady water flow | Unscrew, rinse screen, soak in vinegar |
| Inspect valve seat | Prevents leaks at the spout | Look for damage and corrosion |
| Replace washer / O-ring | Avoids future leaks and wasted water | Match size to part or cartridge |
| Move supply valves | Keeps valves operable in emergencies | Turn slightly each few months |
“Small, routine checks keep most plumbing problems from growing.”
For coverage ideas and extra peace of mind, read about our home tips. Regular care of handles, screws, and internal parts will keep your faucets reliable for years.
Conclusion
Tackling that steady drip rewards you with lower bills and fewer surprise repairs. ,
You can follow one clear step and keep every screw organized as you work.
These simple steps stop that constant dripping and restore your faucet.
Regular checks — like cleaning the aerator and swapping worn seals — protect your home from moisture damage and keep plumbing problems small.
If the task feels too big, get help. With basic tools and patience you can often fix leaky fixtures and enjoy a quieter, more efficient home.