Hardwood floors are a beautiful addition to any home, offering both elegance and durability. With proper maintenance, these floors can last a century or more. However, they face threats from grit, sand, and moisture that can cause significant damage over time. Regular cleaning is essential to protect the finish and maintain their appearance.
Excess moisture can lead to issues like swelling and warping, while abrasive particles act like sandpaper, damaging the protective layers. This guide will provide insights into keeping your floors in top shape, ensuring they not only look great but also enhance your home’s resale value.
You’ll discover effective cleaning methods that address both dirt and moisture. Additionally, we’ll highlight tools like HEPA-filter vacuums that help improve indoor air quality by reducing allergens. Understanding the connection between routine cleaning and finish protection is crucial for preserving the beauty of your hardwood.
Key Takeaways
- Regular maintenance can extend the life of your hardwood.
- Moisture and grit are the main threats to your floor’s finish.
- Proper cleaning enhances indoor air quality.
- HEPA-filter vacuums are effective for removing allergens.
- Well-maintained hardwood may increase home resale value.
What You’ll Need to Clean Hardwood Floors Safely
Having the proper cleaning tools is essential for maintaining the beauty of your floors. A few key items will help you effectively manage dust and dirt while preserving your hardwood’s finish. Start by gathering a microfiber dust mop, a soft-bristle broom, or a vacuum with a hard-floor setting. These tools are designed to gently lift debris without scratching the surface.
Microfiber dust mops are particularly effective, as they trap fine dust, dirt, and pet hair. This is a significant advantage over traditional brooms, which may simply push debris around. Additionally, always consult your flooring manufacturer’s instructions for cleaning products.
Choose a hardwood-specific cleaner, such as Bona or Real Clean Floors, to avoid any potential damage. The right product is crucial, as some retail cleaners can leave a hazy film over time. It’s also wise to keep separate pads for dry dusting and damp cleaning, as each serves a different purpose.
| Cleaning Tool | Purpose | Recommended Brands |
|---|---|---|
| Microfiber Dust Mop | Collects dust and fine debris | Swiffer, Bona |
| Soft-Bristle Broom | Gently sweeps without scratching | O-Cedar, Rubbermaid |
| Hard-Floor Vacuum | Removes dirt and allergens | Dyson, Shark |
| Hardwood Floor Cleaner | Safe cleaning solution | Bona, Real Clean Floors |
Remove Dust, Hair, and Grit Before You Mop
Maintaining the pristine look of your floors requires regular attention to dust and debris. Start every cleaning session by addressing dry grit, as these abrasive particles can scratch the surface over time. High-traffic areas, such as entryways and kitchens, may need sweeping or dust mopping daily to prevent buildup.
Using a microfiber dust mop is an effective way to capture hair, crumbs, and fine debris before you proceed with damp cleaning. For a thorough clean, vacuum about once a week with the hard-floor setting activated. This setting raises the vacuum and deactivates the brush roll, helping to avoid scratches.
Turning off the brush roll is crucial, as stiff bristles can create tiny scratches that gradually dull the finish. Remember, low-traffic areas can be cleaned less often, but visible dirt and spills should always be addressed promptly.
How to Clean Hardwood Floors With a Damp Mop
A well-cared-for wood floor can significantly enhance the aesthetic appeal of any room. Using a damp mop is a crucial step in keeping your hardwood looking its best. Start by applying a small amount of wood-safe cleaner as directed on the label. Avoid flooding the area with solution; a little goes a long way.
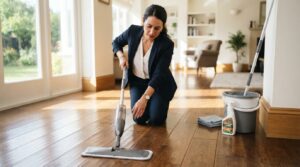
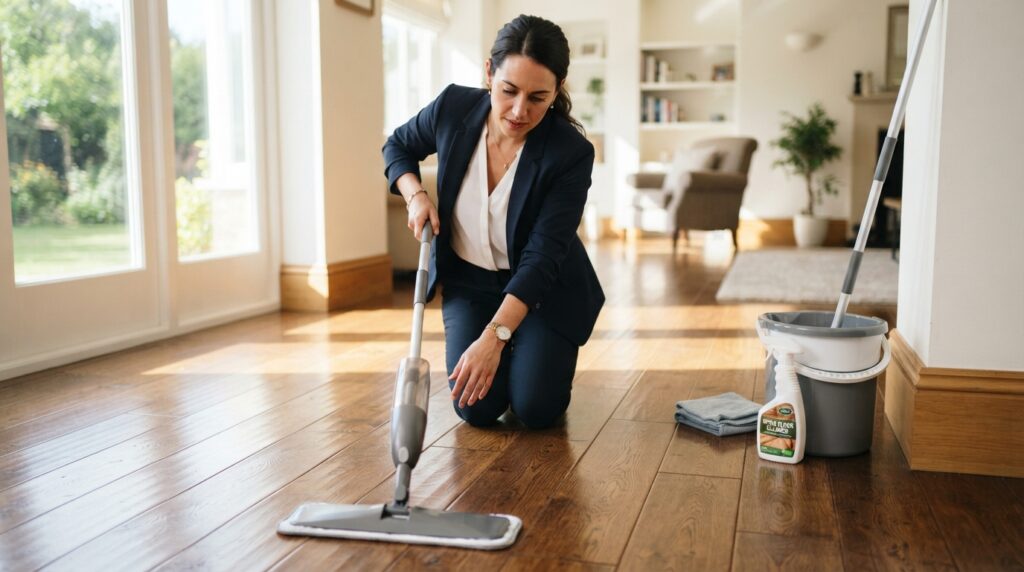
Next, wring out your microfiber mop until it’s damp, not dripping. This prevents excess water from damaging the finish. Mop in the direction of the wood grain for even coverage. If you notice any standing water, promptly wipe it away with a dry microfiber cloth to protect the seams and finish.
High-traffic areas may need this damp cleaning every week or two, while lighter-use spaces can be cleaned less frequently. For faster drying, consider turning on a ceiling fan or using a dry cloth. Remember to rinse or replace your mop pad as it gets dirty to avoid spreading grime.
Clean Spills, Sticky Spots, and Scuffs Without Damaging the Finish
Accidents happen, and knowing how to handle spills and marks can save your hardwood’s finish. Immediate action is crucial when it comes to ordinary spills. Stains and grime can become harder to remove over time, so act quickly.
For sticky spills, use a slightly damp cloth with a drop of dish soap. Make sure to dry the area immediately after cleaning. This method effectively removes the mess without harming the surface.
When it comes to scuff marks, gently rub them with a tennis ball or a dry microfiber cloth. Avoid abrasive pads, as they can create scratches that dull the finish.
If you have pets, clean any messes promptly with a wood-safe enzymatic cleaner. This not only helps eliminate odors but also prevents moisture-related damage. For oil or grease, a soft cloth with a tiny amount of dish soap will do the trick. Always dry the surface thoroughly afterward.
Before using any unfamiliar cleaner, test it in an inconspicuous area first. This precaution is especially important if your floor’s finish or age is unknown.
- Wipe ordinary spills as soon as they occur.
- Treat sticky spills with a damp cloth and dish soap.
- Rub heel marks with a tennis ball instead of abrasive pads.
- Clean pet messes with a wood-safe enzymatic cleaner.
- Use a soft cloth and a tiny amount of dish soap for oil or grease.
- Test unfamiliar cleaners in an inconspicuous area first.
Know Which Cleaners and Tools to Avoid
Understanding which products to avoid is key to preserving the beauty of your wood floors. Certain cleaners can cause irreversible damage to the finish. For instance, steam mops are a big no-no. The heat and moisture they produce can warp the wood and ruin the finish.
Similarly, never use soaking-wet mops. Excess water can seep into seams, leading to swelling and crowning. Vinegar and ammonia might seem like safe options, but they can dull your hardwood’s shine, even when diluted.
Avoid abrasive pads, bleach, and harsh detergents as well. These can scratch and strip the protective surface. Oil soaps and waxes may create a slippery buildup, complicating future maintenance. Always choose products specifically designed for wood floors.
When in doubt, follow your flooring manufacturer’s care instructions. This simple tip can save you from costly mistakes.
Protect Your Hardwood Floors From Everyday Wear
Protecting your hardwood surfaces from daily use is essential for their longevity. Simple strategies can make a big difference in maintaining their beauty. Start by placing mats inside and outside every entrance. This prevents rocks and debris from scratching your floors.
Using area rugs in high-traffic locations can also shield your wood from wear. Make sure to install felt pads under every furniture leg. Check these pads every few months for grit buildup that could cause scratches.
When moving heavy items, use furniture sliders. This helps avoid deep scratches that can occur from dragging. Additionally, promptly wipe up any moisture from rain, wet shoes, or spills. Keeping the humidity in your home between 35% and 55% will help your wood floors maintain their shape.
Lastly, consider a no-shoes rule for high heels and dirty footwear. This simple tip can greatly reduce dirt and damage to your beautiful floors.
| Tip | Description |
|---|---|
| Entry Mats | Catch rocks and debris before they reach the floor. |
| Area Rugs | Protect high-traffic areas from wear. |
| Felt Pads | Installed under furniture legs to prevent scratches. |
| Furniture Sliders | Help prevent scratches when moving heavy items. |
| Humidity Control | Maintain indoor humidity between 35% and 55%. |
Build a Simple Hardwood Floor Cleaning Schedule
Creating a cleaning schedule for your wood floors can help maintain their shine and longevity. Regular upkeep is essential to prevent dirt and grime from dulling the finish. Here’s a simple guide to keep your hardwood looking its best.
Dust or Sweep Regularly and Vacuum About Once a Week
Dust-mop or sweep daily to remove abrasive grit, pet hair, and crumbs. This helps prevent these particles from scratching the surface. Additionally, vacuum weekly using the bare-floor setting to reach grooves and spaces between boards.
Damp-Mop High-Traffic Areas as Needed with a Wood-Safe Cleaner
For high-traffic areas, damp-mop every week or two. Use a cleaner approved for hardwood to avoid damage. This ensures that sticky residue and buildup are effectively removed.
Follow the Flooring Manufacturer’s Guidance for Refinishing and Upkeep
Always check your flooring manufacturer’s instructions for care. They may recommend professional screen-and-recoat work every 3 to 5 years. Sanding and refinishing might be necessary every 10 to 20 years, depending on wear and finish condition.
| Task | Frequency |
|---|---|
| Dust-mop or sweep | Daily |
| Vacuum | Weekly |
| Damp-mop | Every week or two |
| Thorough cleaning with floor cleaner | Monthly |
| Professional maintenance | Every 3 to 5 years |
| Sanding and refinishing | Every 10 to 20 years |
Care for Your Floor’s Finish and Handle Dullness or Scratches
Caring for the finish of your wood floor is vital for maintaining its beauty. Regular checks and maintenance can help keep your hardwood looking its best. Start by reviewing the manufacturer’s care instructions before using any polish, wax, or repair products. This ensures compatibility with your flooring.
To determine the type of finish on your floors, perform a simple water-drop test. Polyurethane finishes typically keep water beaded on the surface, while wax or oil finishes may absorb water or darken. A cloth-rub test can reveal wax residue, helping you identify the appropriate care methods.
When considering products like liquid scratch concealers or repair kits, ensure they match your flooring’s color and finish. Applying polyurethane over wax without professional preparation can lead to peeling. If you notice deep scratches or worn finishes, consult a flooring professional for advice.
Remember, routine maintenance like screen-and-recoat work every 3 to 5 years can extend the life of your finish. This proactive approach can delay more invasive procedures like sanding and refinishing, which may be necessary every 10 to 20 years.
| Test | Description |
|---|---|
| Water-Drop Test | Check if water beads (polyurethane) or absorbs (wax/oil). |
| Cloth-Rub Test | Identify wax residue on a hidden area. |
| Repair Products | Ensure color and finish compatibility before use. |
| Professional Advice | Consult for deep scratches or worn finishes. |
| Maintenance Schedule | Screen-and-recoat every 3 to 5 years. |
Conclusion
Strong care starts with a simple routine: remove grit, then use a barely damp microfiber mop. Dry visible water right away, and choose a manufacturer-approved cleaner. Skip steam, vinegar, ammonia, harsh detergents, and soaking-wet mops.
Regular cleaning helps keep grit from wearing down the finish. Dust each day, vacuum weekly, and damp-mop as needed. Entry mats, area rugs, felt pads, and furniture sliders can limit daily wear. Keep indoor humidity between 35% and 55% to reduce wood movement and protect the floor’s finish.
When you clean hardwood floors with care, you help preserve their look and value. Well-kept hardwood may support a 3% to 5% rise in resale value, while refinishing projects have reported returns as high as 147%. Consistent care can help hardwood last a century or more. Keep your floor routine simple, and your floors can stay ready for everyday life.