Dealing with mold in your home can be a frustrating experience. It often thrives in warm, damp areas, leading to unpleasant odors and potential health issues. Allergic reactions and respiratory problems are common consequences of mold exposure. Fortunately, tackling this problem can be a practical DIY project.
The Home Depot classifies this task as beginner difficulty, estimating it will take about 2-4 hours. This guide will walk you through the essential steps, including inspecting your walls, selecting a safe cleaning solution, and ensuring proper ventilation. Remember, successful cleaning requires addressing moisture issues rather than just wiping away visible growth.
While this guide focuses on manageable surface contamination, it’s important to be aware of hidden mold or significant damage that may require professional assistance. By following these steps, you can create a healthier living environment.
Understand What Causes Mold Growth on Walls
Mold can create significant challenges in maintaining a healthy home. It thrives in warm, moist spaces, particularly in areas like bathrooms, kitchens, and basements. These locations often trap humidity, especially when ventilation is inadequate. This combination of moisture and warmth creates an ideal environment for mold growth.
Visible mold may appear as green, black, or white spots and often emits a musty odor. Mildew, on the other hand, is typically flatter and powdery, often seen in shades of white, gray, or light brown. While mold can be fuzzy or slimy and come in colors like black, green, blue, or red, distinguishing between them based solely on appearance can be tricky.
Common types include Alternaria alternata, Aspergillus spp., Mucor spp., Serpula lacrymans, and Stachybotrys chartarum. If you notice damp surfaces or musty odors, it’s essential to address these issues promptly to prevent potential health risks associated with mold and mildew.
Assess the Affected Wall Before You Start
Before diving into any cleaning project, it’s vital to assess the affected area. Start by estimating the size of the problem. Check if the wall remains structurally sound. If large sections are covered in mold or if the drywall appears damaged, you may need to consider replacement.
Mold can often hide in tricky spots. Look around plumbing fixtures, basement walls, and windows for signs of water damage. These areas are common culprits for moisture buildup. Remember, porous materials like drywall absorb contamination more deeply than painted surfaces.
If the wall feels soft, crumbles, or emits a strong musty smell, it’s time to stop. These signs indicate that mold may extend behind the surface, which could complicate your DIY efforts.
Gather Your Mold Removal Supplies
Gathering the right supplies is essential for effective cleaning. Start by ensuring you have the proper protective equipment. Recommended items include an N-95 respirator or mask, rubber gloves, and sealed goggles. These will help keep you safe while you work.
Next, create a checklist of necessary cleaning materials:
- N-95 respirator or mask
- Rubber gloves
- Sealed goggles
- Cleaning cloths
- A bucket filled with clean water
- A scrub brush for hard surfaces
- Softer cloths or sponges for delicate areas
- Disposable rags and garbage bags
- A fan or dehumidifier
- A separate container for contaminated materials
When selecting a cleaning product, consider the wall material and the extent of the contamination. Remember, The Home Depot estimates this beginner project will take about 2-4 hours, not including any repairs or replacements needed for severely damaged areas.
| Item | Purpose | Notes |
|---|---|---|
| N-95 respirator | Protects against inhaling spores | Essential for safety |
| Rubber gloves | Protects skin from chemicals | Use durable, long-lasting gloves |
| Scrub brush | Removes stubborn spots | Choose one suitable for the surface |
| Cleaning cloths | Wipes down surfaces | Have both soft and disposable types |
Choose a Wall-Safe Mold Cleaning Solution
Selecting the appropriate cleaning method for your walls can significantly impact the results. Various solutions are available, and knowing when to use each can make a difference in your cleaning efforts.
For hard surfaces in kitchens and bathrooms, undiluted white vinegar is highly recommended. It effectively kills spores and is safe for routine cleaning. Vinegar can remain on mildew for up to one hour before you scrub and rinse it away.
On the other hand, detergent mixed with water is ideal for general cleaning of durable materials. For more stubborn cases, commercial products can be used, but ensure they specify compatibility with your wall material.
When considering bleach, use it cautiously. A common mixture is one cup of bleach per gallon of water. Sherwin-Williams suggests a one-part bleach to three-parts water solution, allowing for a ten-minute dwell time before rinsing thoroughly.
Remember: Never mix bleach with ammonia, vinegar, or other cleaners, as this can create dangerous fumes. Always wear rubber gloves and a mask for safety during the cleaning process.
Prepare the Room and Protect Yourself
Preparing your space is crucial before tackling any cleaning task. Start by wearing an N-95 respirator or mask, rubber gloves that extend toward your forearms, and goggles without ventilation holes. This gear is essential to safeguard against harmful spores.
When possible, open windows and doors to promote airflow. This helps reduce airborne spores during the cleaning process. It’s also important to keep children, pets, and anyone with respiratory conditions away from the work area.
Before you begin, move any unaffected belongings away from the wall. Cover nearby items to limit contamination and simplify cleanup later. If you plan to sand moldy wood, remember that special isolation is necessary. The Home Depot advises using a HEPA vacuum to clean up sawdust and disturbed contamination.
How to Remove Mold From Walls
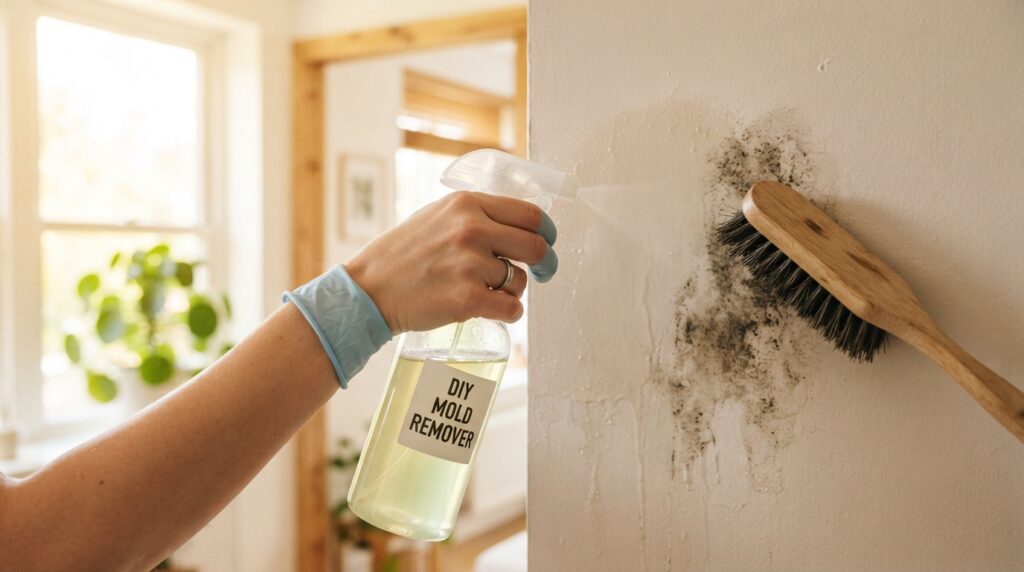
Cleaning mold from surfaces can be a challenging task. The approach varies based on the type of wall you’re dealing with. For painted, nonporous walls, you can usually treat them effectively. Start by brushing away any loose surface mold. Then, gently scrub with a wrung-out sponge or cloth. Rinse the area and allow it to dry completely.
For hard surfaces, using a solution of detergent mixed with water can be very effective. Apply it with a cloth and scrub gently. If you’re working with concrete or masonry, a stiff-bristled brush will help. Mold can penetrate these surfaces more deeply, so thorough rinsing and repeated treatment may be necessary.
Keep in mind that if you find heavily contaminated, soft, or crumbling drywall, it might be time for replacement. Persistent mold on drywall indicates deeper issues that simple cleaning won’t fix. As The Home Depot states, “If you’re unsure, consult a professional for advice.”
Dry the Wall and Clean Up Safely
After cleaning mold, drying the area is essential to prevent future growth. This step is crucial in ensuring that the surfaces remain free from moisture, which can lead to mold’s return. Use fans or a dehumidifier to speed up the drying process. The Home Depot specifically recommends this to help avoid recurring moisture issues.
It’s important that the cleaned wall dries completely before you proceed with painting, sealing, or replacing furniture. This ensures that the cleaning was effective and that no moisture remains to encourage mold growth.
Next, be sure to seal used rags, disposable gloves, and any contaminated materials inside garbage bags before disposal. This will help contain any remaining spores.
For reusable tools, clean them with hot water and soap or rubbing alcohol. If you used brushes, consider soaking them in a bleach solution for an hour, then rinse and dry thoroughly.
Lastly, wash your work clothes immediately in hot water, separate from other laundry. This will limit any potential transfer of spores to other items in your home.
| Item | Action | Notes |
|---|---|---|
| Fans | Accelerate drying | Place near cleaned area |
| Dehumidifier | Reduce moisture | Ideal for closed spaces |
| Garbage bags | Seal contaminated items | Dispose of safely |
| Cleaning tools | Wash with hot water | Use soap or rubbing alcohol |
Prevent Mold From Returning to Your Walls
Preventing mold from returning to your home is essential for a healthy living space. Addressing moisture issues is crucial. The first step is fixing leaks. This is the only reliable long-term solution. Cleaning visible mold does not eliminate the moisture source that causes renewed growth.
Next, keep indoor humidity between 30% and 50%. According to Sherwin-Williams, maintaining humidity below 60% helps prevent mildew. You can use exhaust fans in bathrooms and kitchens. Opening windows when appropriate also helps. Additionally, running a dehumidifier in damp rooms can reduce moisture levels.
Regular inspections are vital. Check plumbing, roofs, windows, gutters, and downspouts for leaks. Water intrusion in any of these areas can restart the problem. Lastly, consider using mold-resistant drywall, paint, and insulation during renovations, especially in moisture-prone spaces like bathrooms and basements.
Know When to Call a Mold Removal Professional
Recognizing when to seek professional help for mold issues in your home is crucial. Some situations require expert intervention to ensure safety and effectiveness.
Consider calling a professional if:
- The mold covers a large area, making it difficult to manage on your own.
- The problem returns even after cleaning efforts.
- You suspect mold extends behind walls or in hidden areas.
- There is significant structural damage to your home.
Individuals with asthma, respiratory conditions, or weakened immune systems should avoid unnecessary exposure during any removal process. Be aware that Stachybotrys chartarum, a dark greenish-black mold, can pose serious health risks.
Professional assessment is advised when dealing with porous materials like drywall or insulation that cannot be thoroughly cleaned and dried. Services like Taskrabbit’s deep cleaning option may provide specialized equipment and expertise for stubborn mold problems.
Conclusion
Effective cleaning combines protective gear, material-specific care, full drying, and a fix for the moisture source. The Home Depot updated its mold guide on February 5, 2025, and rates limited cleanup as beginner-level.
Painted walls, concrete, masonry, and drywall need different cleaning methods because porous materials can hold contamination. Choose a suitable solution, and use bleach only when the label and material allow it.
Keep indoor humidity between 30% and 50%, run ventilation, and repair leaks. These steps help protect your home. For extensive or hidden contamination, structural damage, or unsafe conditions, contact a mold removal professional. With careful cleaning and a dry home, you can keep your space healthier.