Before You Start
Plan on about 20 minutes for the first pass, plus a 10-minute typing test. Skill level: beginner. If you can turn a knob and flip a lever, you’re set.
What You’ll Need
- A fully loaded Aeron with the tilt limiter, seat angle lever, tension knob, 4D arms, and either PostureFit SL or the adjustable lumbar pad. Not sure what you’ve got? Look under the seat and along the back before you touch anything.
- Your size: Size A, B or C. Size B fits roughly 70% of people between 5’3″ and 6’2″. A wrong size will fight every adjustment below, so check it first.
- Remastered or Classic: know which one you own. Remastered chairs use PostureFit SL. Classic chairs often use the strap-controlled lumbar pad.
- Your actual desk and keyboard, set up the way you work. Adjusting the chair at an empty desk gives you the wrong answer.
- Your usual shoes (or bare feet) so seat height matches real life.
- A phone timer for the 10-minute test window, and a notepad to log what changes.
- Optional: a friend to snap a side-view photo of your posture.
What to Skip
- No tools required. Every control on a fully loaded Aeron works by hand.
- Don’t buy a lumbar pillow or footrest yet. Finish the setup first, then decide.
What You’ll Have By the End
- A forward tilt that opens your hip angle and puts your weight on your sit bones.
- PostureFit SL (or the lumbar pad) set so your lower back doesn’t collapse in that forward position.
- 4D arms matched to your keyboard and mouse, with no shoulder shrug.
- A tilt limiter and tension setting that keep you upright without a fight.
- A simple two-week checklist for fine-tuning.
Buying one? A certified pre-owned, fully loaded Aeron with a solid warranty gets you every control listed here. Confirm the configuration before you order.
Most people who buy a Herman Miller Aeron fully loaded never touch the forward tilt. That’s a waste. It’s the one feature that turns a great reclining chair into a great typing chair.
Here’s the problem. Sit back in recline mode for eight hours of spreadsheets and email, and your head drifts toward the monitor, your shoulders round, and your lower back picks up the slack. Sound familiar? Dana Whitfield, a certified workplace ergonomics consultant with 20 years in the field, sees it in nearly every home office she audits. The chair is fine. The setup isn’t.
A fully loaded Aeron carries the tilt limiter, seat angle control, PostureFit SL, and 4D arms. Together they let the seat tip slightly forward, open the hip angle, and put your weight on the sit bones where it belongs. But the order matters, and one wrong setting undoes the rest. Get it right once, and you won’t think about it again.
What You’ll Set Up and What You Need Before You Start (Fully Loaded Aeron Prerequisites)
What “Fully Loaded” Means on an Aeron and Why Forward Tilt Matters
A designer sits down to type, and her knees feel jammed while her lower back slumps. The chair isn’t broken. It’s just missing the forward tilt setting. A Herman Miller Aeron fully loaded includes 4D arms, PostureFit SL, a tilt limiter, and seat angle control. That last one is what tips your pelvis forward for typing.
Check Your Chair: Size A, B or C, Remastered vs Classic, and Which Controls You Have
Start with the size sticker under the seat. Size B fits most people from 5’3″ to 6’2″. Then look at the back. Remastered chairs have PostureFit SL pads; classic chairs have a lumbar pad or a strap. Confirm these levers under the right side of the seat:
- Tilt limiter and tilt tension knob
- Forward tilt (seat angle) control
- Arm height, width, depth and pivot
Missing the forward tilt lever? You’ve got a basic model. Compare it against the Herman Miller Mirra 2 chair if you’d rather not hunt for another Aeron.
Tools and Setup: Desk Height, Keyboard Position and a 10-Minute Test Window
Gather a tape measure and a phone timer. Set your desk so elbows rest near 90 degrees. Place the keyboard flat, close to your body. Then block out ten uninterrupted minutes of real typing. Short tests lie.
Step 1: Reset the Chair to Neutral and Set Seat Height and Seat Depth
Forward tilt only works when the base setup is right. Start by backing the tilt limiter off — putting the Herman Miller Aeron fully loaded in its upright, neutral position. Sit all the way back so your hips touch the seat back. Dana’s rule: fix the bottom half of the body first, then the arms and back.
Seat Height: Feet Flat, Thighs Level, Elbows Near 90 Degrees
Any Herman Miller chair with a pneumatic lift responds to the same check. Raise or lower the seat using the right-side paddle until:
- Both feet sit flat on the floor.
- Your thighs run level, or tilt slightly down.
- Elbows rest near 90 degrees with forearms parallel to the desk.
A Size B seat spans roughly 16″ to 20.5″, so most people land mid-range. Check the Aeron’s seat height against your desk before you commit.
If This Goes Wrong: Pressure Behind the Knees or Sliding Forward in the Seat
Feel pressure behind your knees? The seat’s too deep for you. Sliding forward? Same culprit, from the other direction. Leave a gap of about two fingers between the seat edge and the back of your knee. Compare this with the Herman Miller Mirra chair, which offers seat-depth sliding. The Aeron relies on correct size selection instead, so if the gap won’t come right, you’ve likely got the wrong size. Check the size chart.
Step 2: Find and Engage the Forward Tilt Controls on the Aeron Fully Loaded
Locating the Tilt Limiter, Seat Angle Lever and Tension Knob
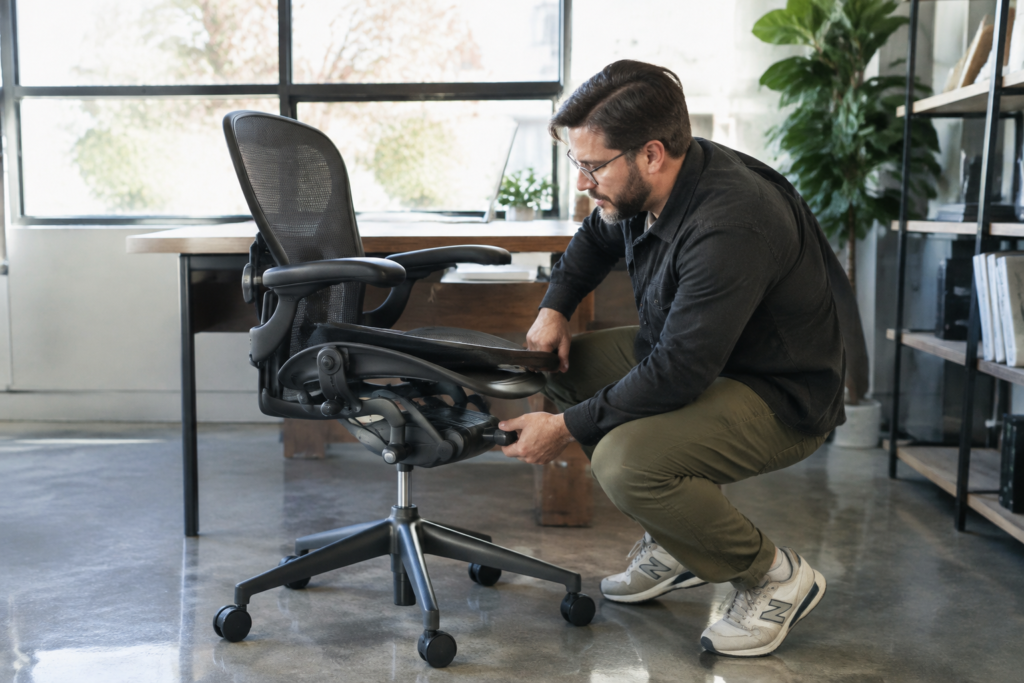
Where are the controls hiding? Under the right side of the seat, mostly. On a Herman Miller office chair like this one, reach down and feel for three parts.
- Tilt limiter: a small lever at the back of the right side. It sets recline to one of three stops.
- Seat angle lever: sits just ahead of it. Lift it to tip the seat forward.
- Tension knob: the large dial under the seat. Turn it until recline feels firm, not floppy.
Basic models skip the seat angle lever. Only the Herman Miller Aeron fully loaded has it.
Setting the Seat Angle Adjustment for a Slight Forward Pelvic Tilt
Sit first. Then lift the seat angle lever and let your weight tip the seat forward about one notch. That’s it. Set the tilt limiter upright so the back stays supportive while you type.
Owners of a Herman Miller leather office chair style executive setup will find the same lever logic here.
Expected Result: Open Hip Angle, Neutral Pelvis and Weight on the Sit Bones
Your hips should open past 90 degrees. Your pelvis sits neutral, not rolled back. Weight lands on the sit bones instead of your tailbone. If your thighs feel pushed off the seat, you’ve gone too far. Back off half a notch.
Step 3: Dial In PostureFit SL Support So Forward Tilt Doesn’t Collapse Your Lower Back
Roughly 7 out of 10 people who lean forward to type slide their pelvis backward within an hour. That’s the slump forward tilt is supposed to prevent. Dana Whitfield, a certified ergonomics consultant, sees it constantly: the tilt is set — the back support isn’t.
On a Herman Miller Aeron fully loaded chair, PostureFit SL is what holds the pelvis in place. Many Herman Miller office chairs ship with it, but a pre-owned one from Madison Seating arrives certified, so every pad moves freely.
Adjusting the Sacral and Lumbar Pads Separately
Two pads, two jobs. Don’t treat them as one.
- Sit back fully with forward tilt engaged.
- Reach behind and turn the lower sacral control until the pad nudges your tailbone area. Firm, not pushy.
- Adjust the upper lumbar control until you feel gentle contact at your belt line.
- Type for ten minutes. If your lower back aches, add sacral support. Rounded shoulders? Back off the lumbar.
Tip: What To Do If You Have a Classic Aeron With the Adjustable Lumbar Pad Instead
Classic models skip PostureFit. Instead, slide the single pad up or down its track until it fills the curve above your beltline. Then set it a notch firmer than feels natural, because forward tilt reduces contact. Simple. And effective.
Step 4: Match the 4D Arms, Tilt Tension and Tilt Limiter to Your Typing Position
Most people think the arms are there for resting. They’re not. On a herman miller ergonomic chair like the herman miller aeron fully loaded, the arms exist to unload your shoulders while you type.
Arm Height, Width, Depth, and Pivot for Keyboard and Mouse Work
- Height: raise the pads until your elbows sit at about 90 degrees and your shoulders stay relaxed.
- Width: bring them in so your forearms track straight to the keyboard.
- Depth: slide the pads forward until they touch your forearms, not your elbow tips.
- Pivot: angle them slightly inward for a mouse hand.
Lock the Tilt Limiter and Tune Tension So You Stay Upright Without Fighting the Chair
Set the tilt limiter to the upright or first position. Then turn the tension knob until the back holds you without pushing you forward. Too loose and you’ll sink. Too tight and you’ll brace.
Shoppers comparing Herman Miller chairs for sale should confirm the chair has the tilt limiter, since basic models skip it.
If This Goes Wrong: Shoulder Shrug, Wrist Reach or Slouching Back Into Recline
- Shoulder shrug: arms are too high. Drop them an inch.
- Wrist reach: pads are too far back. Slide them forward.
- Slouching into recline: the limiter isn’t locked, or tension is too soft.
Step 5: Test, Troubleshoot and Fine-Tune Over the First Two Weeks
A designer sets her forward tilt on Monday, types happily for an hour, and by Wednesday her lower back aches. Sound familiar? That’s normal. Muscles need days to adjust to a new angle.
Dana Whitfield, a certified ergonomics consultant, tells clients to treat the first fortnight as a test period. A herman miller aeron fully loaded gives you the controls to keep adjusting, so use them.
Days 1-3: Change One Thing at a Time
- Set the tilt limiter and forward tilt, then leave them alone for two full workdays.
- Check that your feet sit flat and your hips rest slightly above your knees.
- Note any pressure behind the knees. If it shows up, slide your seat angle back a notch.
Days 4-14: Troubleshoot Common Complaints
Sliding forward in the seat? Add PostureFit SL support at the sacrum. Neck strain? Raise the 4D arms until your shoulders drop. Still unsure whether the Aeron suits your body? Compare it with the Herman Miller Mirra 2, which handles tilt differently.
Give each tweak 48 hours. Then judge it. Most people settle on a final setup by day ten, and a chair certified and backed by a warranty lets you keep refining without worry.
Recap and What to Tackle Next: Your Fully Loaded Aeron Checklist, Buying a Pre-Owned Fully Loaded Aeron With a Warranty, and Follow-Up Tutorials
Forward tilt only works when the chair has it. A Herman Miller Aeron fully loaded comes with the forward tilt, tilt limiter, PostureFit SL, and 4D arms, so every step in this tutorial is possible on that configuration. A basic Aeron skips most of them.
Your Fully Loaded Aeron Checklist
- Set seat height so your feet sit flat and your thighs run parallel to the floor.
- Turn on forward tilt and lock it at a slight downward angle.
- Dial PostureFit SL until your sacrum feels supported, not pushed.
- Raise the arms until your elbows sit at about 90 degrees.
- Set the tilt limiter and tension for your weight.
Buying Pre-Owned With a Warranty
Used doesn’t mean risky. Look for certified, authentic chairs with a written warranty. Madison Seating, for example, inspects each chair at 127 points and backs it with 10 years of coverage. You can browse a Herman Miller ergonomic office chair in sizes A, B, and C. Check the size chart first, because a wrong size ruins the fit.
Follow-Up Tutorials
- Choosing between Size B and Size C
- Classic versus Remastered differences
- Setting tilt tension by body weight
Recap & Next Steps
You’ve got the chair set up for typing. Here’s what you did, in order.
- Reset to neutral and set seat height so your feet sit flat, and your elbows land near 90 degrees.
- Found the forward tilt controls on your fully loaded Aeron and set a slight pelvic tilt, with weight on your sit bones.
- Dialed in PostureFit SL (or the adjustable lumbar pad on a Classic) so the forward tilt doesn’t collapse your lower back.
- Matched the 4D arms, tilt limiter, and tension to your keyboard and mouse height.
- Tested for two weeks and changed one setting at a time.
Give it a fair shot. Your body needs about 10 to 14 days to adjust to a new seat position, so a little awkwardness early on is normal.
What to Tackle Next
- Set up your reclined position. Typing posture is only half the day. Use the tilt limiter’s other stops for calls, reading, and thinking breaks, and keep the tension knob at a level you can recline against without effort.
- Check your desk and monitor. A perfect chair can’t fix a keyboard that sits too high. Put the top of your screen at or just below eye level, and raise the desk or add a keyboard tray if your shoulders creep up.
- Double-check your size. If you still slide forward or feel pressure behind the knees, Size A, B, or C may be the real issue. Size B fits most people from 5’3″ to 6’2″, but taller or heavier users often need Size C.
- Buying a fully loaded Aeron? Look for a pre-owned or open-box chair that’s authentic and certified, with a real warranty. Confirm it has the tilt limiter, seat angle, PostureFit SL or adjustable lumbar, and 4D arms before you order. At Madison Seating, every refurbished Aeron goes through a 127-point inspection and carries a 10-year warranty.
Pick one tweak, make it today — sit with it for a week.
That’s how a chair starts working for you.
A good typing posture on an Aeron comes down to order. Seat height first, then the forward tilt, then back support, then arms. Skip ahead, and the later steps fight the earlier ones.
The payoff is a pelvis that rolls slightly forward, hips that stay open, and a lower back that isn’t left hanging. PostureFit SL does the quiet work there, and the 4D arms keep shoulders from creeping toward the ears. Most people feel the difference within a few days. Full adjustment to the new position usually takes two weeks, so small tweaks are normal and expected.
A Herman Miller Aeron fully loaded gives typists every control needed to make this setup work. A base-level chair simply can’t match it. Buyers watching their budget have a sensible route: a certified, pre-owned fully loaded Aeron with a solid warranty delivers the same adjustability, provided the seller verifies authentic parts and tests each mechanism.
Next step: sit down today, run the ten-minute test from Step 5, and jot down which control feels off. Then browse fully loaded Aeron listings at Madison Seating, filter by your size (A, B or C), and check that the tilt limiter and PostureFit SL are included before ordering.